Cannabis light bleaching is the whitest bad news a grow light can deliver: the topmost leaves and bracts lose their green pigment because they are receiving more photons than the plant can use at that moment, and the damage in the white tissue is permanent. What surprises most growers is that bleaching is rarely caused by a PPFD number being too high on paper. Peer-reviewed trials have run cannabis at 1,800 µmol/m²/s without reported light stress, while real rooms bleach their tops at 900. The difference is not the number; it is the gap between the photons delivered and the photons the plant could actually use at that hour, in that spot, with its CO₂, temperature, VPD, acclimation state and genetics all counted. This guide separates those variables, gives the diagnosis order that avoids wasted money, and sets out the correction and prevention sequence for the next run. Every figure assumes a licensed commercial indoor facility; check your local regulations before applying them.
Bleaching is irreversible photo-oxidation of chlorophyll in the tissue that sits closest to the light source. Once a bract or sugar leaf turns white, that tissue never regains its color, because the chlorophyll molecules and the chloroplast structures behind them are destroyed faster than the plant can rebuild them. What recovers is everything else: the spread stops within days once delivery drops back under capacity, and new growth comes in green within about two weeks.
The cause is almost never intensity alone. A 2021 University of Guelph trial ran flowering cannabis across PPFD levels from 120 to 1,800 µmol/m²/s at ambient CO₂ and reported no light stress, with dry flower yield climbing linearly the whole way. Rooms bleach at far lower intensities because one of the capacity variables is clamped: CO₂ ran out, the canopy got no acclimation time, a hot spot sits under one fixture, or stomata closed under a VPD spike. Dim or raise first to stop the damage, then measure to find which variable moved, then fix that variable. Do not touch the nutrient feed until the measurements say otherwise.
Bleaching announces itself days before the white stage, and the early stages are reversible. The first sign is a pale, washed-out lime color on the highest sugar leaves and bracts, the tissue that faces the fixture directly. The shaded underside of the same leaf stays green, which is the single most reliable visual signature: bleaching reads from the top down and from the lit side inward. Stage two is yellowing that advances down the leaf blade and along the bract tips on that same face. Stage three is the first white patches on bract tissue, usually with pistils at the crown browning earlier and denser than the rest of the cola. Stage four is chalk-white calyx tissue with a papery, dry feel.
Position matters as much as color. If the pale growth faces the aisle, a wall, or a gap between fixtures, suspect something else. True bleaching concentrates exactly where the fixture's footprint peaks, which is why rooms with uneven hanging heights bleach in patches rather than across the whole canopy.
| Stage | What you see | Where it starts | Reversible? |
|---|---|---|---|
| 1. Pale wash | Lime-pale color on the highest sugar leaves | The lit face of the topmost leaves | Yes, if intensity drops now |
| 2. Advancing yellow | Yellowing moving down the blade, bract tips paling | Same face, spreading inward | Partly; the spread can be stopped |
| 3. White patches | White bract tissue, crown pistils browning early | The uppermost cola tips | No; the affected tissue is lost |
| 4. Chalk-white calyx | White calyx tissue with a papery, dry feel | Crown and upper third of the cola | Never; grade it at trim |
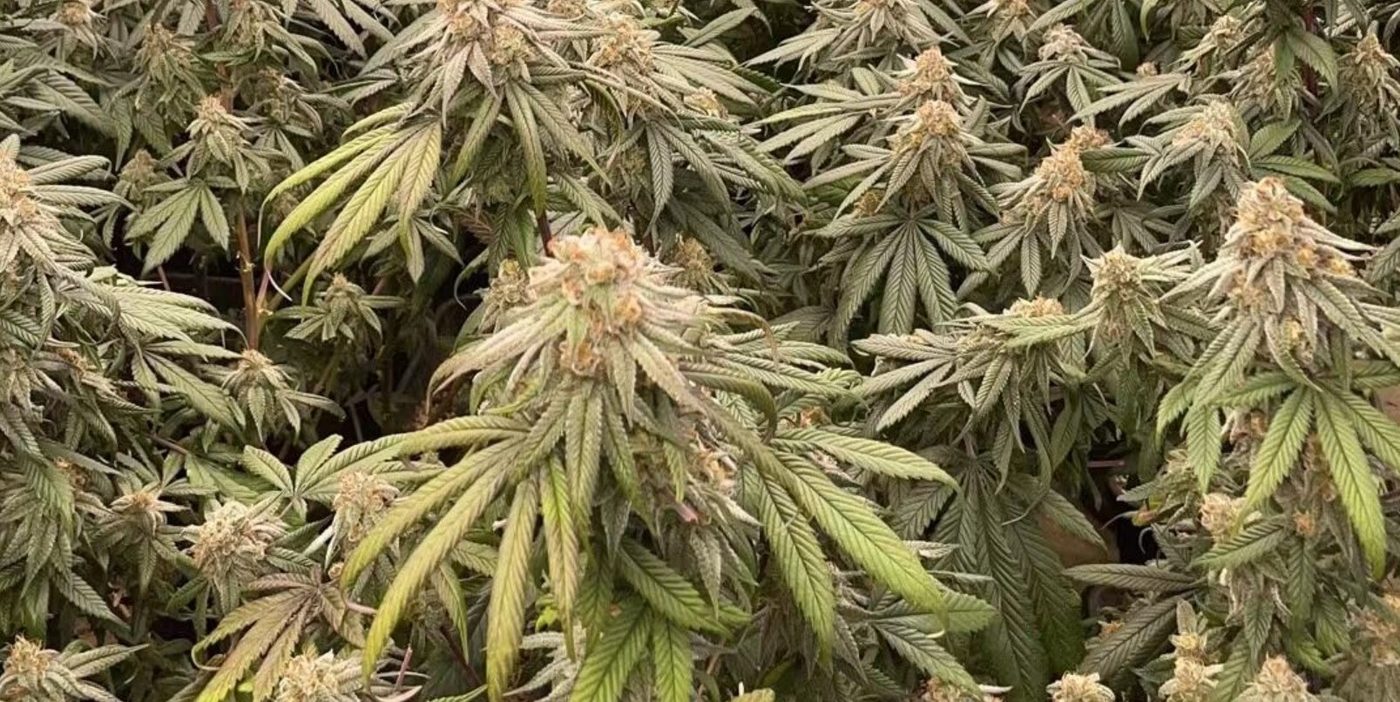
Four other conditions share the bleaching stage, and each one has a different fix, so the differential has to come before any correction. Light burn is the heat-driven cousin: leaves curl or taco upward, tips crisp brown, and the damage tracks temperature as much as intensity. Nutrient fade runs the opposite direction, starting on older, lower leaves and working upward slowly over weeks. Heavy trichome frost is the friendly impostor: a thick resin coat reads white from a distance, but up close the white sits on top of green calyx tissue and glistens at an angle, while bleached tissue has no green left underneath. Powdery mildew is the dangerous impostor: it looks like a dusting on the surface and smudges when wiped, which bleaching never does.
The full side-by-side method, including the two measurements that settle light burn versus deficiency, is in our diagnosis guide: light burn vs nutrient deficiency. If the yellowing starts at the bottom of the plant instead of the top, the answer usually lives in why cannabis leaves turn yellow. And if you are seeing stretch, thin stems and pale growth everywhere rather than white tops, that is the opposite problem: cannabis not enough light symptoms.
| Condition | Pattern on the plant | How fast it moves | Settle it with |
|---|---|---|---|
| Bleaching | Pale to white on the lit face only, tops first | Days, spreading while delivery stays high | PAR grid plus the position map |
| Light burn | Upward curl, browned crisp tips, heat signature | Days, tracking temperature spikes | IR leaf temperature and the VPD log |
| Nutrient fade | Older lower leaves yellow first, climbing slowly | Weeks, from the bottom up | Runoff EC and the feed log |
| Heavy frost | Crystal coat over green calyxes, glistens at an angle | Builds through flower, harmless | Tilt the bud; green stays underneath |
| Powdery mildew | White dusting that smudges when wiped | Spreads leaf to leaf in still air | Wipe test and magnification |
The persistent forum rule says cannabis bleaches above 1,000 µmol/m²/s. The peer-reviewed record says otherwise. Rodriguez-Morrison, Llewellyn and Zheng at the University of Guelph grew flowering cannabis for twelve weeks under canopy PPFD from 120 to 1,800 µmol/m²/s at ambient CO₂, and dry inflorescence yield increased linearly across the whole range, from 116 to 519 grams per square meter, with no light stress reported. A 2022 follow-up on a high-THC cultivar found inflorescence dry weight roughly 1.6 times higher at 1,000 than at 600 µmol/m²/s, again with no stress and no significant change in cannabinoid potency. Older gas-exchange work by Chandra and colleagues at the University of Mississippi found leaf-level net photosynthesis rising with light up to about 1,500 µmol/m²/s at 30 °C before declining, and rising further when CO₂ was enriched above 1,000 ppm.
The resolution of the apparent contradiction is the difference between a leaf and a canopy. A single leaf saturates photosynthetically far below 1,800 µmol/m²/s, which is where the old ceiling number comes from. The plant as a whole keeps converting extra photons into flower because the extra intensity reaches lower leaves, side branches and interior bud sites that were light-starved before. None of this means intensity cannot hurt; it means intensity alone is not the variable that decides bleaching. The dose framework behind these numbers is laid out in PPFD and DLI targets for cannabis and daily light integral for plant growth.
The working model is a balance. On one side sits photon delivery: the peak PPFD at the hottest point of the canopy, the spectrum and UV fraction of the fixture, and the hours on the clock. On the other side sits the plant's capacity to use those photons: CO₂ supply, leaf temperature, VPD-driven stomata behavior, acclimation state, and cultivar tolerance. Bleaching begins where delivery exceeds capacity, and the excess energy has nowhere to go except into reactive oxygen species that attack the photosynthetic reaction centers and the chlorophyll around them.
This is why the same 1,000 µmol/m²/s bleaches one room and feeds another, and why the PAR meter reading at canopy center cannot answer the question by itself. The sections that follow walk each capacity variable in the order they most often fail in commercial rooms.
Photosynthesis is a carbon-fixing reaction, so the plant's capacity to use light is capped by the carbon it can pull through open stomata. At ambient CO₂ near 420 ppm, that cap sits well below what modern fixtures can deliver; with enrichment, the cap rises. The working pairing we use on our own sizing calls is roughly 800 to 1,000 ppm of CO₂ to support a canopy at 900 µmol/m²/s, and the Chandra gas-exchange data shows why: at 1,500 µmol/m²/s, net photosynthesis only kept climbing when CO₂ ran above 1,000 ppm. A room that bleaches at 1,100 µmol/m²/s on ambient air may not have a light problem at all; it has a CO₂ problem wearing a light problem's clothes.
Two cautions belong here. Enrichment added after bleaching appears does not rescue the already-damaged tissue; it only raises capacity for what is left. And enrichment in a room that leaks or that runs a broken VPD band is money vented to the exhaust fan. The injection targets, sensor placement and sequencing with photoperiod are covered in CO₂ enrichment and PPFD matching.
Plants build their photosynthetic machinery for the light they have been living under. A crop raised at 400 to 600 µmol/m²/s in veg carries reaction centers, pigment ratios and protective carotenoid pools tuned to that range. Move the same plants under 1,200 µmol/m²/s overnight and the machinery overflows, even though 1,200 is a legitimate target for a plant that had time to adapt. Field experience across commercial rooms puts a workable pacing rule on this: raise canopy PPFD by no more than about 100 to 150 µmol/m²/s every three to five days, and watch the tops at every step. This pacing is practice, not a trial result, so treat it as a conservative starting point and adjust to the cultivar.
The two moments this rule gets broken are predictable: the transfer from the veg room to the flower room, and the week-three ramp after the stretch, when everyone is tempted to jump straight to peak intensity. Both are scheduling problems, and both disappear the moment the ramp is written into the controller instead of remembered by staff.
| Stage | Canopy PPFD target | Step rule | Watch at the crown |
|---|---|---|---|
| Late veg | 400 to 600 µmol/m²/s | Hold steady | Even color across the tops |
| Transition, weeks 1 to 2 | 600 to 700 µmol/m²/s | Up 100 to 150 every 3 to 5 days | Sugar leaves at the new crown |
| Mid flower, weeks 3 to 6 | 800 to 1,000 at ambient CO₂; up to 1,200 to 1,500 with enrichment | Same step rule, no skips | Bract tips and pistil color |
| Late flower, week 7 to harvest | Hold, or taper 10 to 20 percent | One move, then observe | Crown pistils and bract texture |
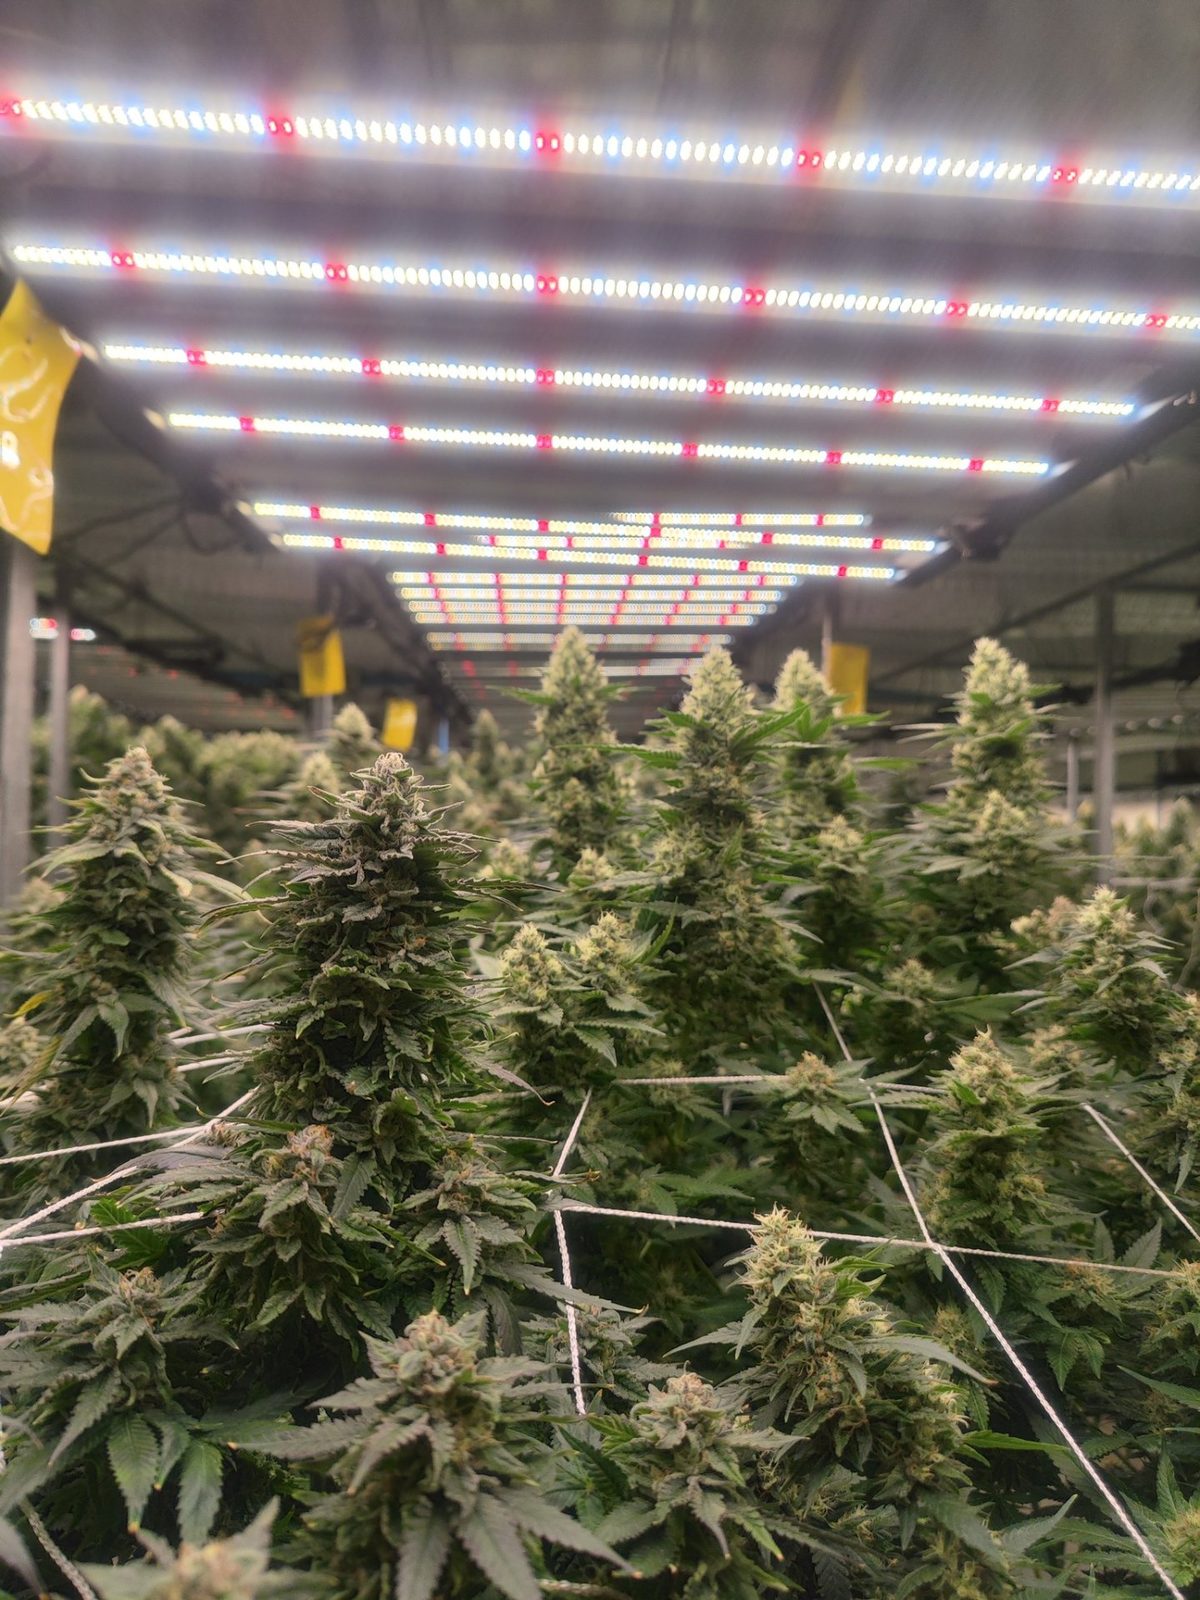
An average reading flatters a bad layout. The center of a fixture's footprint can run 20 to 30 percent above the room mean, and the tops sitting under those peaks are the ones that bleach while the edges of the canopy stay underfed. This is the most mechanical of all the causes: measure the canopy on a 1 by 1 meter grid at final hanging height and flowering setpoint, log the numbers, and the bleach map will match the hot-spot map almost point for point. Commercial rooms should hold canopy readings within roughly ±15 percent of the mean, which in minimum-to-average terms lands near 0.85, comfortably above the 0.75 redesign floor in the ASABE S640 horticultural lighting standard.
The fix is geometry, not output. Adjacent footprints should overlap 10 to 20 percent, fixtures should hang at the height their PPFD maps assume, and dark seams get closed by moving fixtures, not by turning the rest up. The row arithmetic is in how many fixtures does my room need. One pattern worth knowing: if bleaching appears only under certain fixtures, check the dimmer channels before the layout, because a neighbor fixture running low pushes its share of the load onto the ones around it.
Under LED fixtures, leaves commonly run 1 to 3 °C below room air because transpiration cools the leaf surface, so the thermostat on the wall is not reading the organ that matters. The plant lives at leaf temperature. When VPD climbs too high, stomata close to conserve water; closed stomata stop the CO₂ supply and stall the transpiration stream, leaf temperature climbs, and the capacity side of the balance collapses while the fixture keeps delivering at full rate. The room can hold a perfect air temperature and a perfect PAR number the entire time. A ten-dollar infrared thermometer pointed at the canopy face at the same hour each day catches this failure days before the first pale leaf.
The paired targets for flower rooms are a VPD band around 1.0 to 1.5 kPa with daytime canopy temperatures in the mid-20s °C, stepped down in late flower. The full bands and control logic are in VPD targets for cannabis rooms and ideal temperatures for growing cannabis.
A PAR meter counts photons; it does not score what those photons do. Blue and UV-B photons carry more energy per photon and drive the plant's photoprotective chemistry harder than red photons at the same PPFD, which is why fixtures with aggressive UV channels or very blue-rich spectra can photo-oxidize bract tissue at readings that look modest. If bleaching appears under one fixture model and not another at identical PPFD, spectrum is the first suspect, and the UV and far-red trade-offs are mapped in UV and far-red in grow lights and spectrum for cannabis flower.
The second half of the question, why only the top colas, has two mundane answers. They are closest to the source, and intensity climbs steeply as distance shrinks. And they are the newest tissue on the plant: after the stretch, the upper growth expanded into a light field the rest of the plant was already acclimated to, so the crown carries the least-adapted tissue in the highest-intensity zone. Bleaching at the top of an otherwise healthy canopy is the expected physics, not a defect in your crop.
Bleaching clusters at five recurring moments, and each maps to one of the variables above. The first is the veg-to-flower transfer, when plants jump rooms and intensities in a single move. The second is the week-three ramp after the stretch, when intensity climbs just as the newest, least-acclimated growth occupies the highest positions. The third is any fixture swap or layout change, which quietly redraws the hot-spot map. The fourth is a heat wave or HVAC fault, when VPD and leaf temperature shift the capacity side overnight while delivery stays fixed. The fifth is late flower, when colas keep swelling toward the fixture for weeks after the last height adjustment and the crown quietly closes the gap the map assumed.
None of these require new equipment to prevent. They require the observation habit: a weekly PAR spot check at the crown and an IR reading at the same hour, logged against the stage of the cycle, catches every one of these while the fix is still a dimmer setting.
The honest accounting starts with position. The top of the cola is normally the densest, heaviest and most resinous part of the plant, and it is the first part bleaching takes. Bleached tissue carries damaged trichome heads, degraded terpenes and no chlorophyll left to support further ripening, so it grades down, gets pulled at sorting, or drags the look of the whole batch. Rooms rarely lose the whole plant; they lose the best ten centimeters of every top cola in the affected zone, plus the trimming and sorting labor to separate what could have been sold together.
The deeper cost is consistency. A batch with bleached crowns mixed through it reads uneven to any buyer who opens the bag, and consistency is what commercial pricing is built on. Weigh the lost position against the fix: the corrections in the next section cost a dimmer setting, a height adjustment, or a controller schedule, and the prevention checklist costs an afternoon before flower. We will not put a percentage on the loss, because the honest number depends on how far it spread before you caught it; the point is that the canopy zone contributing the most grams per square foot is the zone bleaching removes first.
Act in sequence and you will rarely need step three. Step one: dim the affected zone 10 to 20 percent or raise the fixtures 10 to 15 centimeters. Dim first, raise second; dimming is reversible in seconds and does not redraw the footprint. This stops the damage now and buys you the measurement window. Step two: measure before you change anything else. Run the PAR grid at canopy height, take IR leaf temperatures at the crown, and pull the CO₂ and VPD logs for the past week. The variable that moved is the cause; the one that did not is not.
Step three: fix the variable that moved. Restore the CO₂ supply, repair the airflow fault, re-set the VPD band, correct the dimmer channel, or re-hang the fixture that drifted. Step four: observe for 48 hours. Progression must stop, and new growth must stay green; if pale tissue keeps advancing after delivery dropped, re-run step two because the wrong variable got fixed. Four moves to skip entirely: flushing the medium, cutting the feed, blasting the air conditioning, and swapping fixtures mid-cycle. The first three treat a nutrient or heat problem you may not have, and the fourth redraws the map while you are still reading it. Dimming schedules, staggered starts and zone control are what controllers exist for: grow light controller features that matter.
The white tissue never comes back. Chlorophyll that has been photo-oxidized is not re-synthesized in place, damaged trichome heads do not regrow, and bleached calyxes stay bleached to harvest. Plan the harvest around that fact: affected tops are graded on what remains, and the separation work happens at trim, not in the room.
Everything else does come back, on a predictable timeline once delivery drops under capacity. Within 24 to 48 hours, stomata reopen and the tacoed, stressed leaf posture relaxes. Within three to five days, the chlorosis stops advancing; hold the line here and the damage is bounded. Within about two weeks, new bracts and sugar leaves at the crown emerge fully green, and the lower two-thirds of previously affected colas mature to normal quality. Those milestones are field observations, not lab guarantees, so verify against your own room and cultivar, but the order is reliable: posture first, spread second, new growth last.
The run after that is where prevention pays. Commission the flower room before the crop goes in: meter the grid at flowering setpoint, take the IR baseline, audit the CO₂ supply, and write the ramp schedule into the controller with one owner. Rooms that run that checklist treat bleaching as a solved problem.
No. A University of Guelph trial ran flowering cannabis up to 1,800 µmol/m²/s at ambient CO₂ without reported light stress, and yield rose linearly across the range. Bleaching starts when delivered photons exceed what the plant can use at that moment, which is set by CO₂, acclimation, leaf temperature, VPD, spectrum and genetics, not by one intensity number.
There is no universal threshold. Rooms bleach anywhere from 900 µmol/m²/s upward when a capacity variable is clamped, while acclimated, CO₂-enriched, well-ventilated canopies run far higher without damage. The useful check is not the number at canopy center but the gap between the hottest point on your grid and what your CO₂, leaf temperature and VPD can support.
White, bleached tissue never recovers because the chlorophyll and trichome heads in it are permanently damaged. What recovers is the plant: the spread stops within days once intensity drops back under capacity, new growth comes in green within about two weeks, and the lower parts of affected colas mature normally.
Bleached tissue is degraded tissue: trichome heads are damaged and terpenes break down along with the chlorophyll, so affected tops grade down in potency, aroma and appearance. The damage is local, not systemic. Flower from the lower, unaffected parts of the same plant keeps its normal quality.
Look at the tissue underneath. Frost is a crystal coat that sits on top of healthy green calyxes and glistens when you tilt the bud in the light. Bleaching has removed the green itself, so the tissue looks matte and chalky at any angle, and it concentrates on the faces that point at the fixture.
Two reasons stack at the crown. The tops sit closest to the fixture, where intensity climbs steeply as distance shrinks, and the upper growth after the stretch is the newest, least-acclimated tissue on the plant. Lowest capacity meets highest delivery at the crown, so the crown bleaches first.
Blue and UV-B photons carry more energy and push photoprotective responses harder than red photons at the same PPFD, so a blue-rich or UV-heavy fixture can photo-oxidize tissue at readings that look safe. If one fixture model bleaches and another does not at equal PPFD, compare spectra before touching the intensity.
Dim first, raise second. Dimming by 10 to 20 percent stops the damage in seconds and is fully reversible, while raising the fixture also widens the footprint and changes the uniformity the rest of the room was planned around. Re-measure the grid after either move.
CO₂ enrichment raises the plant's capacity to use light, so it widens the safe intensity band, but it does not repair tissue that has already bleached. Enrichment only works in a sealed room with the VPD band holding; in a leaky room the added CO₂ leaves through the exhaust.
Leaf posture relaxes within 24 to 48 hours as stomata reopen. The yellowing should stop advancing within three to five days, and new growth at the crown should emerge fully green within about two weeks. If pale tissue keeps spreading after delivery dropped, the wrong variable was corrected; measure again.
It advances only while delivery stays above capacity, moving downward from the crown along the lit face of the cola. Once intensity is corrected, the spread stops within days and stays stopped. The tissue already bleached does not spread further on its own; it is dead pigment, not an infection.
Cultivars differ in tolerance. Some genetics carry denser protective pigment and thicker carotenoid pools and shrug off intensity that bleaches a sensitive cultivar at the same PPFD. Treat the cultivar as one more capacity variable: run a new genetic conservatively on the first cycle and ramp by response, not by schedule.
Send the room size, canopy area, current fixture model and hanging height, plus a photo of the tops. We answer with a corrected intensity target, the uniformity numbers to meter against, and a dimming or layout plan that holds the ramp without drift.
