
This page is the placement-and-timing companion to our guide on what LED greenhouse lighting suits a small to medium house, which works out how big the light deficit is and which fixture class fills it. Here we assume the target DLI and the fixture class are decided, and we answer the two questions that remain: where every fixture goes, and when it runs. Both answers serve the same variable, which is how evenly the canopy is lit, because unevenness is a yield problem that no wattage can repair after the fact.
The Short Answer: Three Numbers and One Uniformity Target
Three numbers decide the arrangement. The first is mounting height, measured from the fixture face to the top of the flowering canopy, never to the floor. The second is centre-to-centre spacing, and the honest way to express it is as a ratio to that height, because the same 3 m spacing behaves differently at 3 m and at 4 m. The third is the daily lamp hours, and the honest way to derive it is from the DLI the sun has already delivered, not from a timer's factory setting.
The one target is uniformity. On acceptance day, the dimmest measuring point on the canopy should read at least 80 percent of the zone average. Everything else in this page, the beam-angle arithmetic, the half-spacing row at the walls, the truss offsets, the threshold controller, exists to protect that line, because a room that averages its target but loses the edges has bought light it cannot harvest.
Measure the Daylight Before You Place a Fixture
A greenhouse does not start from darkness, and it does not start from uniformity either. Glazing, gutters, ridge vents, shading screens and the structure itself split the daylight into bright patches and dull ones, and the split moves with the season. A quantum sensor held at canopy height at midday, repeated in three or four positions across the house, produces a working transmission map in ten minutes, the same measurement our sizing guide starts from. In the 78 percent-transmission example that guide uses, the canopy sees roughly six times more daily light in July than in January.
The layout has to correct the building's own unevenness, not just add to it. A perfectly regular grid of fixtures hung over an irregular roof still delivers an irregular canopy: the bay under the dirty glazing needs its fixtures closer, or its row raised, or it needs to be its own zone. Measure first, place second. The schedule depends on the same measurement, because a threshold controller cannot supplement intelligently against a daylight number nobody has written down.
Beam Angle, Mounting Height and Spacing: Two Decide the Third
Three geometric variables set the coverage of every fixture: the beam angle the optics produce, the height of the fixture above the canopy, and the spacing between fixtures. The practical rule is that you choose two and the third follows. Beam angle is mostly fixed by the product you bought. Mounting height is constrained by the truss above and by the work aisle below. Spacing is the one variable left genuinely free, and it is the one you use to buy uniformity.
The discipline that holds a layout together is to keep the ratio of spacing to height constant whenever either changes. Raise the fixtures half a metre and the coverage circle widens, so the spacing can widen with it; drop the fixtures for a short crop and the spacing must tighten or the overlap disappears. A layout that ignores this couples two decisions that should move together, and the canopy shows stripes where it failed.
Bar fixtures make the rule apply twice. Centre-to-centre spacing across rows is the spacing buyers usually picture, but the gap between the ends of bars along the same row is its own spacing decision, and along-row gaps are where bar layouts most often leak light. Both directions obey the same ratio logic: at the mounting height you chose, each gap has a width at which the overlap of neighbours covers the seam. The datasheet map that came with the fixture was measured at a stated height on a stated grid, and our guide to reading PPFD and DLI numbers covers how to re-derive it at yours.
The Spacing-to-Height Ratio Does the Real Work
Divide centre-to-centre spacing by mounting height above the canopy and you have the spacing-to-height ratio, the single number that predicts whether a grid of fixtures lights a canopy or a set of bright circles on a dark field. For bar optics in the 110 to 120 degree range, the ratio that keeps the four-fixture overlap deep enough is between 1.0 and 1.2. Below that band the layout is very even and buys fixtures the canopy does not need; above it, the midpoint between four fixtures dips visibly and the canopy starts showing rows.
| Spacing-to-height ratio | What the overlap does | Uniformity risk | Where it fits |
|---|---|---|---|
| 0.8 or lower | Four-fixture overlap stacks deep; the midpoint barely dips | Low, but the house pays for fixtures the canopy does not need | Research bays, propagation, or optics narrower than 110 degrees |
| 1.0 to 1.2 | Overlap stays deep enough that the midpoint holds near the under-fixture output | The working band for 110 to 120 degree bar optics | Most cannabis greenhouses with 3 to 5 m trusses |
| 1.3 to 1.4 | The midpoint dips visibly; the canopy begins to show rows | Edge rows and row gaps need active correction | Budget layouts with optics designed for wide throw |
| 1.5 or higher | Overlap thins out; stripes run along the canopy | High; lamp hours cannot repair the geometry | Not recommended for flowering cannabis |
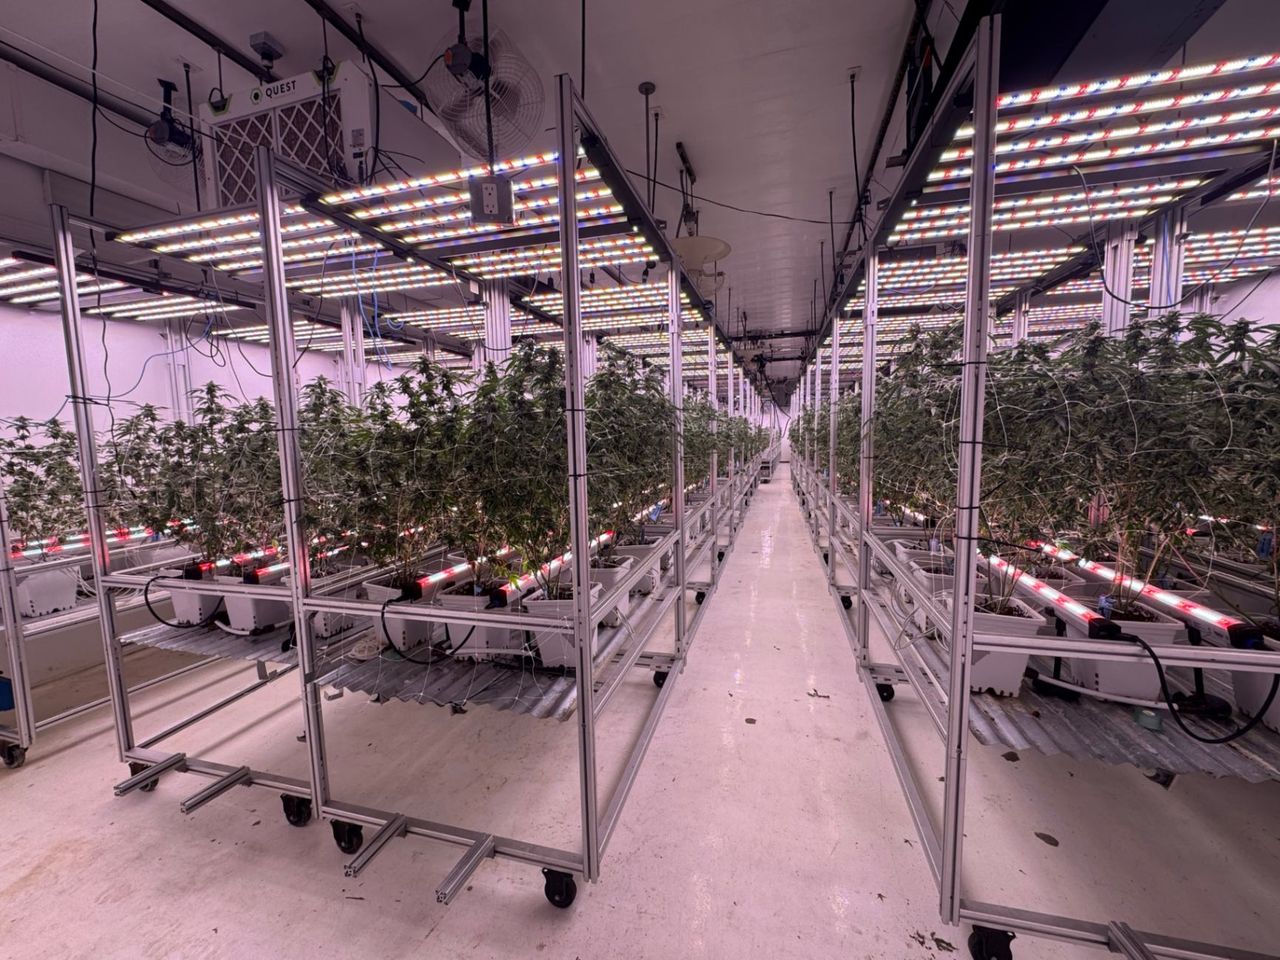
Two placement details decide whether the ratio survives contact with a real building. Height is measured to the canopy, and the canopy is not static: either hang on adjustable cables and re-set the height as the crop grows, or plan a respacing at flip, because a ratio calculated for a week-one canopy is not the ratio the room runs at peak flower. And the ratio only describes the interior of the grid; the edges obey a different rule, which is the next section.
Edge Loss: Why the Last Row Is Always the Darkest
A fixture in the middle of a grid receives overlap from neighbours on all four sides. A fixture in the last row receives overlap from one side only. Half the overlap means the outer band of canopy runs visibly under target, in every greenhouse layout that places fixtures on a regular grid and stops at the wall, and it is the single most common reason a house that averages its DLI still grows unevenly.
The standard correction costs almost nothing: place the first and last row half a spacing from the wall or gutter instead of a full spacing. The half-spacing row re-creates the missing overlap on the outboard side, and the edge band joins the rest of the canopy. The alternatives are honest but weaker: accept a dark production edge and put the walkway there, or add a border row of fixtures, which is the half-spacing logic with its own invoice.
Aisles deserve the same arithmetic. Light that lands on a walkway is not lost if the crop never needed it, but a wide central aisle between two fixture rows turns each side of the aisle into a second edge problem, twice over. Narrow the aisle, or run the aisle-side rows at the half-spacing offset, or fit shielding so the fixtures spend their photons on the canopy instead of the corridor. The layout that solves edges and aisles at the drawing stage costs nothing extra; solved after installation, both cost fixtures.
Trusses, Purlins and Fans: The Shadows You Built In
Between the fixture face and the canopy sits everything the building owns: truss chords, purlins, ridge vents, energy screens, heating pipes, irrigation rails and circulation fans. A gutter-connected house commonly runs 3 to 5 m to the truss, as our greenhouse guide notes, and every metre of that structure owns a shadow. Sunlight moves, so sun shadows sweep; lamp shadows do not. A purlin that crosses a fixture's beam puts a permanent dark stripe on the canopy at the same place every day of the run.
The fixes are layout decisions, not hardware. Offset fixture positions relative to fixed obstructions so no beam runs parallel under a purlin for its whole width. Keep fixtures out of the shadow cone of fan hubs and ducting, which is static and permanent. Coordinate with the screen system: a shading screen must be retracted whenever the lamps run, and that interlock belongs in the controller logic, not in someone's memory. Energy screens that stay open at night under the lamps are the easy case; screens that close while a photoperiod lamp is still running are the expensive one.
Verifying Uniformity With a PPFD Grid
After installation, the layout is a claim until it is measured. Measure after dark, so the sun cannot flatter the grid; measure at final canopy height, not at the bench; measure on a grid, one point per 2 by 2 metres at minimum, or nine points per bay for a fast pass. For each zone, divide the dimmest reading by the average and compare it against the 0.80 line. A zone that misses the line has a geometry problem, and hours will not repair it: adding lamp time raises the average and the edges together, and the spread survives every extra hour.
The response to a failed grid is spatial, in this order: tighten spacing in the weak band, raise fixtures that show a hot spot over a cold one, add the half-spacing border row the drawing skipped. Re-measure after each change, because the overlap arithmetic is local and one adjustment moves its neighbours. Then log the map. It becomes the baseline the schedule is built on, the reference for the annual re-audit as LED output ages, and the document that settles every future dispute about what the room actually receives.
| # | Check on acceptance day | What it protects |
|---|---|---|
| 1 | PPFD grid map at final canopy height, after dark | Proves the geometry, not the datasheet |
| 2 | Minimum-to-average ratio per zone, in writing | The 0.80 acceptance line |
| 3 | First and last row offset from the wall, measured | Half a spacing, not a full one |
| 4 | Fixture positions against purlins, fans and screens | No static shadow stripes |
| 5 | Zone boundaries and controller addresses | One setting per real condition |
| 6 | Sensor placement at canopy height, per zone | Threshold control reads the plant, not the ridge |
| 7 | Ramp and stagger settings on the controller | Demand spikes and step changes both live here |
| 8 | As-built spacing and height drawing | The baseline every future audit compares against |
Acceptance day is also the right day to capture the controller's as-built configuration, because the zones, addresses and ramp settings on the screen are part of the lighting system every bit as much as the fixtures are. Our guide to grow light controllers covers the wiring side; the schedule that runs on top of it is the second half of this page.
Zoning a Greenhouse for Light, Not Just for Pipes
A single lighting zone forces one setting onto a house with many conditions, which is why our sizing guide calls zoning the cheapest upgrade in any greenhouse. Zone by glazing transmission, because a south gable and a north wall do not receive the same daylight. Zone by crop stage, because a propagation bench and a flowering block run different DLI targets. Zone by direction, because the bay on the morning sun side finishes its threshold earlier than the bay behind it.
Zones are also what make the schedule honest. In April, the south bay of a house may need no supplement at all on clear days while the north bay still needs four evening hours. With zones and a controller that responds to per-zone sensors, that difference costs nothing to serve; with one zone, the compromise runs the whole house on the average of two wrong settings. Specify the zones on the drawing even if only one is wired in the first season, because adding zones to a wired house is renovation, not configuration.
Scheduling Principle One: DLI Is the Budget, Hours Divide It
The daily light integral is the sum of photons the canopy receives across the photoperiod, and the conversion the whole schedule rests on is simple: DLI equals PPFD times hours times 0.0036. A canopy at 1,000 µmol/m²/s for 6 hours receives 21.6 mol/m², because 1,000 × 6 × 0.0036 = 21.6. Our guide to DLI and plant growth develops the budget side; here the budget meets the greenhouse, where the sun pays part of it before the lamps switch on.
Work the arithmetic once with the numbers stated openly. Take a flowering target of 40 mol/m²/day, the middle of the 30 to 45 band commercial flower rooms run under ambient CO₂. By four in the afternoon on a January day, the canopy of that 78 percent-transmission house has received 18.4 mol. The deficit is 21.6 mol, and the hours still available inside the photoperiod decide the intensity the lamps must deliver: over 6 lamp hours the lamps must average 21.6 ÷ (6 × 0.0036) = 1,000 µmol/m²/s; squeezed into 4 hours, the same deficit needs 1,500. The hours you leave the lamps set the intensity you must buy, which is why fixture count and schedule are one decision made at two desks. Our guide on how many fixtures a room needs works the other half of that arithmetic.
The principle cuts against a habit indoor rooms teach. In a sealed room, hours and intensity are freely exchangeable because there is no sun; in a greenhouse, the sun has already spent the morning hours, the photoperiod caps the evening ones, and the budget has to fit inside what remains. A schedule that cannot deliver the deficit inside the available hours is not a scheduling problem. It is a fixture count problem wearing a scheduling costume.
Scheduling Principle Two: Supplement to a Threshold, Not to a Clock
Indoor rooms run clocks because they have no alternative. A greenhouse that runs a fixed six-hour timer has chosen the worst of both worlds: on clear days it overlights, on grey weeks it undersells, and in the months between it does both in the same week. The sun is the reason the greenhouse is cheap to light, and it is also the reason a clock is the wrong instrument.
Threshold control replaces the clock with the plant's point of view. A quantum sensor at canopy height reports what the canopy is actually receiving; the controller runs the lamps whenever the combined PPFD falls below the zone setpoint, dims them as the sun recovers, and stops at the daily hours cap and the photoperiod limit. Cloud passes stop being scheduling events. The setpoint is expressed at the canopy, not at the ridge, which is why sensor placement belongs in the acceptance checklist above.
Where the controller cannot take sensors, run a hybrid and say so in the plan: a fixed evening block sized from the monthly calendar below, adjusted by hand at the season's turn, with the hours cap enforced in hardware. The hybrid concedes efficiency to the weather; it does not have to concede the photoperiod. What it cannot do is follow the weather hour by hour, and a house whose winter weeks swing between clear and grey will feel that limit in its DLI variance.
Photoperiod, Light Deprivation and the Greenhouse Schedule
Photoperiod is a signal, not a dose. For photoperiod-sensitive cannabis, roughly 12 hours of light triggers and maintains flowering, and the schedule's first obligation is to deliver that signal cleanly: the same day length every day of the crop cycle, and an uninterrupted dark period, because a lamp that strays past lights-out can reset the signal the crop has been building for weeks. Our guide to light leaks and the green-light question covers the indoor version of that failure; in a greenhouse the equivalent risk is a fixture zone or a neighbouring house bleeding into the blackout.
Summer inverts the problem. Light deprivation pulls the photoperiod down to 12 hours with blackout, and the lamps' job changes from marking the day to filling its intensity; a house running light dep uses its fixtures mostly for grey weeks and shoulder hours. Winter is the mirror image: the lamps extend the day toward 12 hours and then top up intensity inside it. The rule that keeps both seasons honest is the one above: photoperiod fixed, DLI delivery variable. A schedule that varies the photoperiod to chase the weather is not a schedule; it is a signal the crop did not ask for.
Ramp, Don't Snap: The First and Last Half Hour
A house that snaps from dark to full output at switch-on pays twice. Physiologically, the canopy takes a step change it would not receive from a rising sun. Electrically, every fixture in the zone reaches full draw at the same second, and the monthly demand charge is set by exactly such a moment. Ramping the zone up over 15 to 30 minutes, and staggering the zone starts so no two zones peak together, costs nothing in DLI and removes both the step and the spike.
Ramping is a controller setting, and it deserves a place on the acceptance checklist for the same reason the sensors do. Our guide to dimming before you buy covers why fixtures that dim smoothly down to off behave better at both ends of the cycle. The last half hour matters as much as the first: a house that cuts from full to dark at lights-out ends the photoperiod with a second step, and a fade-out returns the crop to the dark period the way the sun would.
The Twelve-Month Greenhouse Light Schedule
The structure of the lighting year is set by the sun's calendar, and the bands below describe a flowering cannabis house at mid-northern latitudes in a roughly 78 percent-transmission house. Latitude and glazing move every number; the shape of the year does not.
| Months | What the house receives | What the lamps do | Typical lamp share of the photoperiod |
|---|---|---|---|
| December to February | The shortest, greyest days of the year; a fraction of the summer daily dose | Extend the day toward 12 hours, then top up intensity inside it | The longest blocks of the year, roughly 6 to 10 hours a day |
| March to April | Day length and sun angle climb fast | Threshold top-ups in the evening; day extension shrinks | 2 to 6 hours, shrinking weekly |
| May to August | The sun covers the budget on most days | Mostly idle; light-dep blackout sets the photoperiod; lamps serve grey weeks | 0 to 4 hours, cloud-driven |
| September to October | Sun angle slides; light deprivation ends | Threshold top-ups resume; evening blocks lengthen | 2 to 6 hours, growing weekly |
| November | Short days return | Day extension plus intensity top-up return | 4 to 8 hours |
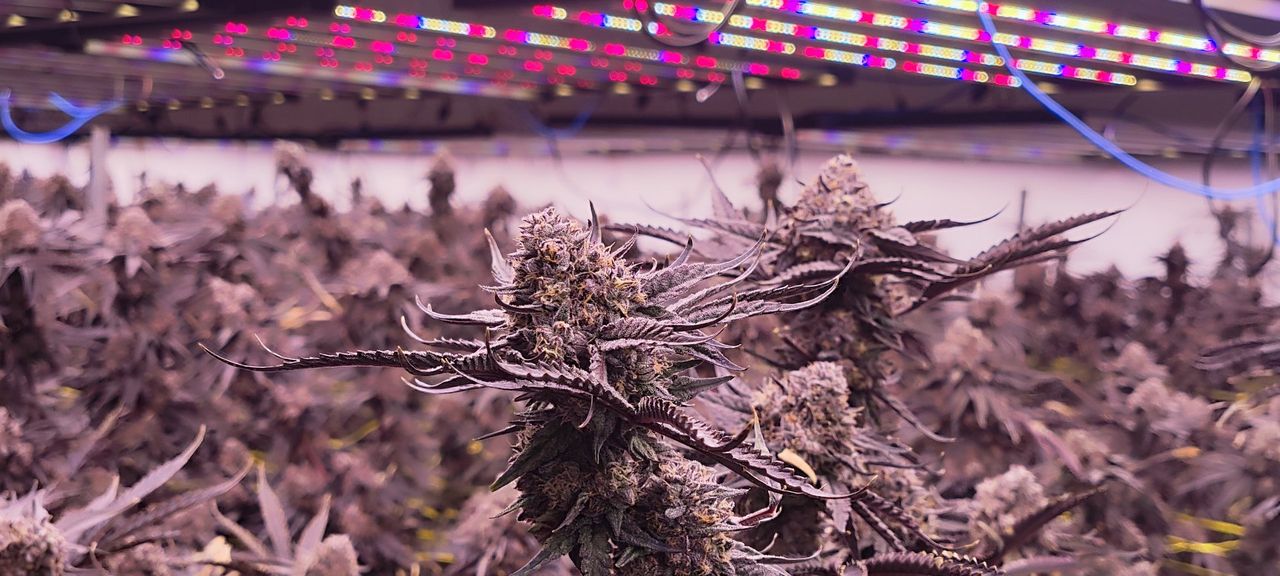
Two habits keep the calendar honest. Review the schedule at the season's turns, roughly eight times a year, rather than trusting a timer set once in November to still be right in April. And keep the hours cap visible in the plan, because the calendar describes what the lamps typically do, not a permission: a grey June week can ask for more lamp hours than the June row shows, and a threshold controller with a cap will serve it without the house having to renegotiate its own rules.
Scheduling Around Tariffs and Demand Charges
Electricity prices two things, and the schedule touches both. Energy is the kWh line, and where the photoperiod allows a choice, pushing the lamp block into off-peak hours is money the plan picks up for free. Demand is the peak kW line, set by the single highest simultaneous draw of the month, and it is a scheduling variable before it is a hardware variable: staggered zone ramps, the kind section twelve described, are how a house shaves its peak without buying less light. Our guide to demand charges and lighting load works the arithmetic in full.
One precedence rule keeps the tariff work honest: photoperiod beats tariffs. A flowering schedule that needs its light to end at a certain hour cannot slide for a rate, and a crop signal that moves for a rate is a crop signal you broke. Where the two conflict, fix the demand problem in fixture count and zone sequencing, and let the energy line follow the photoperiod rather than the reverse.
Heat, Humidity and the Night Shift
Every watt a fixture draws ends as heat, eventually, and in a greenhouse that heat has a season-dependent value. In winter it is a credit: lamp hours at night offset heating the house needed anyway. In summer it is a load: venting that heat can push a house to stop its lamps earlier than the DLI wanted, and the schedule should anticipate that ceiling rather than discover it in July.
Humidity is the harder half of the night shift. When the lamps cut at lights-out, the canopy keeps transpiring into air that is no longer being warmed, relative humidity climbs, and the condensation and botrytis risk arrives with it. The greenhouse answers with dehumidification and airflow, which our guide to VPD in cannabis puts in the plant's own terms, not with lamp hours: running lamps into the dark period for their heat alone buys warmth at the price of the photoperiod signal, which is the worst exchange in the house. Schedule the climate around the lights-out step the same way the controller ramps it: deliberately, not as an afterthought.
The Seven Mistakes Greenhouse Layouts Make
Most of them have already appeared above, which is the point: each one is cheap on the drawing and expensive on the canopy.
Spacing from the datasheet map at the wrong height. The map was measured at a stated height; re-derive it at yours, or the ratio you think you bought is not the ratio you installed.
Full spacing at the walls. The edge rows lose half their overlap and the outer canopy runs under target all season. Half a spacing from the wall is the fix that costs nothing.
Planning on the floor plan instead of the canopy plane. Aisles, racks and future growth all live between the fixture and the bed, and a layout that looks even on paper measures uneven at the leaves.
Ignoring static shadows. Purlins, fan hubs and screens cast lamp shadows that never move. Offset the grid against them at the drawing stage.
One zone for a house with two climates. South gable and north wall, propagation and flower: one setting for both means one wrong setting for each.
A fixed timer in a house with weather. Overlights clear days, undersells grey ones. Threshold control, or at least a seasonal hybrid, is the honest instrument.
Scheduling hours without a PPFD map. Hours repair the average and cannot repair the spread. Measure the grid first, then buy hours for the deficit the map actually shows.
Frequently Asked Questions
How far apart should greenhouse grow lights be spaced?
Express spacing as a ratio to mounting height above the canopy rather than as a fixed distance. For bar optics in the 110 to 120 degree range, a spacing-to-height ratio between 1.0 and 1.2 keeps the overlap between four neighbouring fixtures deep enough that the canopy midpoint holds near the under-fixture output. At 3 m above the canopy that means 3.0 to 3.6 m centre-to-centre, adjusted whenever the height changes.
What mounting height should greenhouse lights hang at?
As high as the truss and the workflow allow, then kept at a constant ratio to spacing. Height is measured from the fixture face to the top of the flowering canopy, not to the bed or the floor, and it rises as the canopy grows unless you re-set it. In a gutter-connected house with a 3 to 5 m truss, the working height above a flowering canopy is whatever the ratio arithmetic leaves after the structure takes its share.
How do I make greenhouse light coverage even?
Three moves cover most houses. Hold the spacing-to-height ratio in the 1.0 to 1.2 band so the four-fixture overlap stays deep. Bring the first and last rows half a spacing from the walls so the edge canopy gets the overlap the grid geometry denied it. Offset fixtures against purlins, fans and screens so no static shadow crosses the canopy. Then verify with a night-time PPFD grid at canopy height: the dimmest point should read at least 80 percent of the zone average.
How many hours a day should greenhouse lights run?
However many the DLI arithmetic requires, not a fixed number. The formula is DLI = PPFD × hours × 0.0036. If the canopy has received 18.4 mol from the sun by late afternoon and the target is 40, the 21.6 mol deficit takes 6 hours at 1,000 µmol/m²/s or 4 hours at 1,500. In winter that works out to the longest lamp blocks of the year; by late spring the sun covers the budget and the hours fall toward what grey weeks need.
Should greenhouse lights run on a timer or a light sensor?
A sensor, where the controller allows it. A fixed timer knows nothing about the weather, so it overlights clear days and undersells grey ones. Threshold control uses a canopy-level quantum sensor and runs the lamps whenever the combined PPFD falls below the zone setpoint, capped by a daily hours limit and the photoperiod. Where sensors are not an option, run a fixed evening block sized from the seasonal calendar and adjust it at the season's turns.
What uniformity should a greenhouse lighting layout achieve?
Use the minimum-to-average ratio measured on a canopy-level grid after dark. The acceptance line most houses can hold with the geometry in this guide is 0.80: the dimmest measuring point at 80 percent of the zone average or better. A zone that misses the line has a geometry problem, and adding lamp hours raises the average and the edges together without closing the gap between them.
Do greenhouse lights need to be dimmed?
Dimming earns its place twice. Threshold controllers use it to follow the sun, dimming the lamps as daylight rises and raising them in a cloud pass instead of switching them. Ramping uses it at the day's edges: a 15 to 30 minute fade at switch-on and lights-out removes the step change the canopy would otherwise take, and staggering zone ramps keeps several zones from peaking on the meter at the same second, which is what sets the month's demand charge.
Can I run greenhouse lights at night?
Yes, and in winter the lamp heat is a real credit against heating. Two limits apply. The photoperiod: for flowering cannabis the dark period is part of the signal, and lamps running into it carry a cost no tariff arithmetic pays back. Humidity: after lights-out the canopy keeps transpiring into cooler air, so the night shift needs dehumidification and airflow behind it. Off-peak tariffs can make night hours cheaper to run, but the crop signal decides first.
How does light deprivation change the lighting schedule?
It changes the lamps' job from marking the day to filling it. A light-dep house pulls the photoperiod down to 12 hours with blackout, and the fixtures serve intensity, mostly on grey weeks and shoulder hours, rather than day extension. The schedule rule that survives is the same in both seasons: photoperiod fixed, DLI delivery variable. The blackout system and the lighting controller need to be coordinated, because a screen that closes while a lamp zone is still running is an expensive mistake.
How much DLI does flowering cannabis need in a greenhouse?
Commercial flower rooms budget 30 to 45 mol/m²/day under ambient CO₂, and 40 to 65 where CO₂ is enriched and the HVAC can carry it. The greenhouse schedule's job is to make sun plus lamps hit the target, which the threshold controller does by measuring what the canopy has already received and supplementing the remainder inside the photoperiod.
Why are the edges of my greenhouse darker than the middle?
Grid geometry. A mid-grid fixture gets overlap from neighbours on four sides; an edge fixture gets it from one. Half the overlap leaves the outer canopy band under target for the whole run. The standard fix is placing the first and last rows half a spacing from the wall instead of a full spacing, which restores the missing overlap; the alternatives are a border row of fixtures or accepting the dark band and putting the walkway there.
What should I send a supplier for a greenhouse lighting layout?
Eight things: house dimensions and gutter or truss height, glazing type and your measured transmission, the DLI target for the crop and stage, the zones you plan to run, the obstructions that cast fixed shadows, the photoperiod and any light-dep plan, the tariff structure if demand charges matter, and the controller you intend to drive the zones with. A layout drawn from those eight points arrives as an as-built plan rather than a guess, and it is the same list our request-a-quote form asks for.